12.09.2011

The Italians are coming! ... and other stuff

I enjoyed a great "Flames of War" Birthday. I was given money to buy myself something, and I recently sold my N-Scale train collection. That all equals a FoW shopping spree! I'm also getting 2 Priests, M2 Half Track and the Hellfire and Back book for Christmas (shhh... it's supposed to be a surprise). Here's what I picked up:

- M7 Priest (x2)
- US Artillery Staff Team
- Sherman Dozer
- M4A3 Sherman (x2)
- SSgt. Lafayette Pool
- Plastic Soldier Company 76mm Sherman Boxed Set
- M15 AA Half Track
- M16 AA Half Track
- North Africa Paint Set
- Rare Earth Magnets (for turrets)
- Citadel Matte Spray

AND......

-Italian 75/27 Cannon Platoon


With the purchase of the American equipment, that should wrap up my late war purchases for a while. This will give me the option of fielding a Medium Tank Company, instead of the Armored Rifle Company that I always take.

The 75/27 Cannon Platoon is the start of my early war Carri Company. I'm really looking forward to stepping out of my comfort zone, that is the American Army.

11.14.2011

Fire For Effect!


  During a successful trip to Fall-In in Lancaster, PA a few weeks ago, I went with little money, but was able to pick up quite a few reasonably priced FoW finds. I started gathering the men and equipment to form my Armored Field Artillery Battery to compliment my Armored Infantry Company. I only held onto a couple of the items I bought, as it was strongly suggested by the wife that the remainder be put up for my birthday and Christmas.

  No problem, as I have plenty of other projects to complete. My Jeeps will definitely look better with crews in them. No more 1940's driver-less "Knight Rider" in my company! I also added static grass to all of my bases. In error, I had only used flocking on them previously. I'm very happy with the results. It really livens up the bases nicely.

   Here are a few pics of the two M7 Priests that didn't make it into my Christmas stocking. They are finished except for the MG's, crew and matte finish.  The GMC truck in the background is my test dummy for paints and finishes. Enjoy!


11.08.2011

OP Sherman Update - 2 (Finale)

OK... so my tutorial is a little compressed. Sorry, but I get anxious to finish my projects.

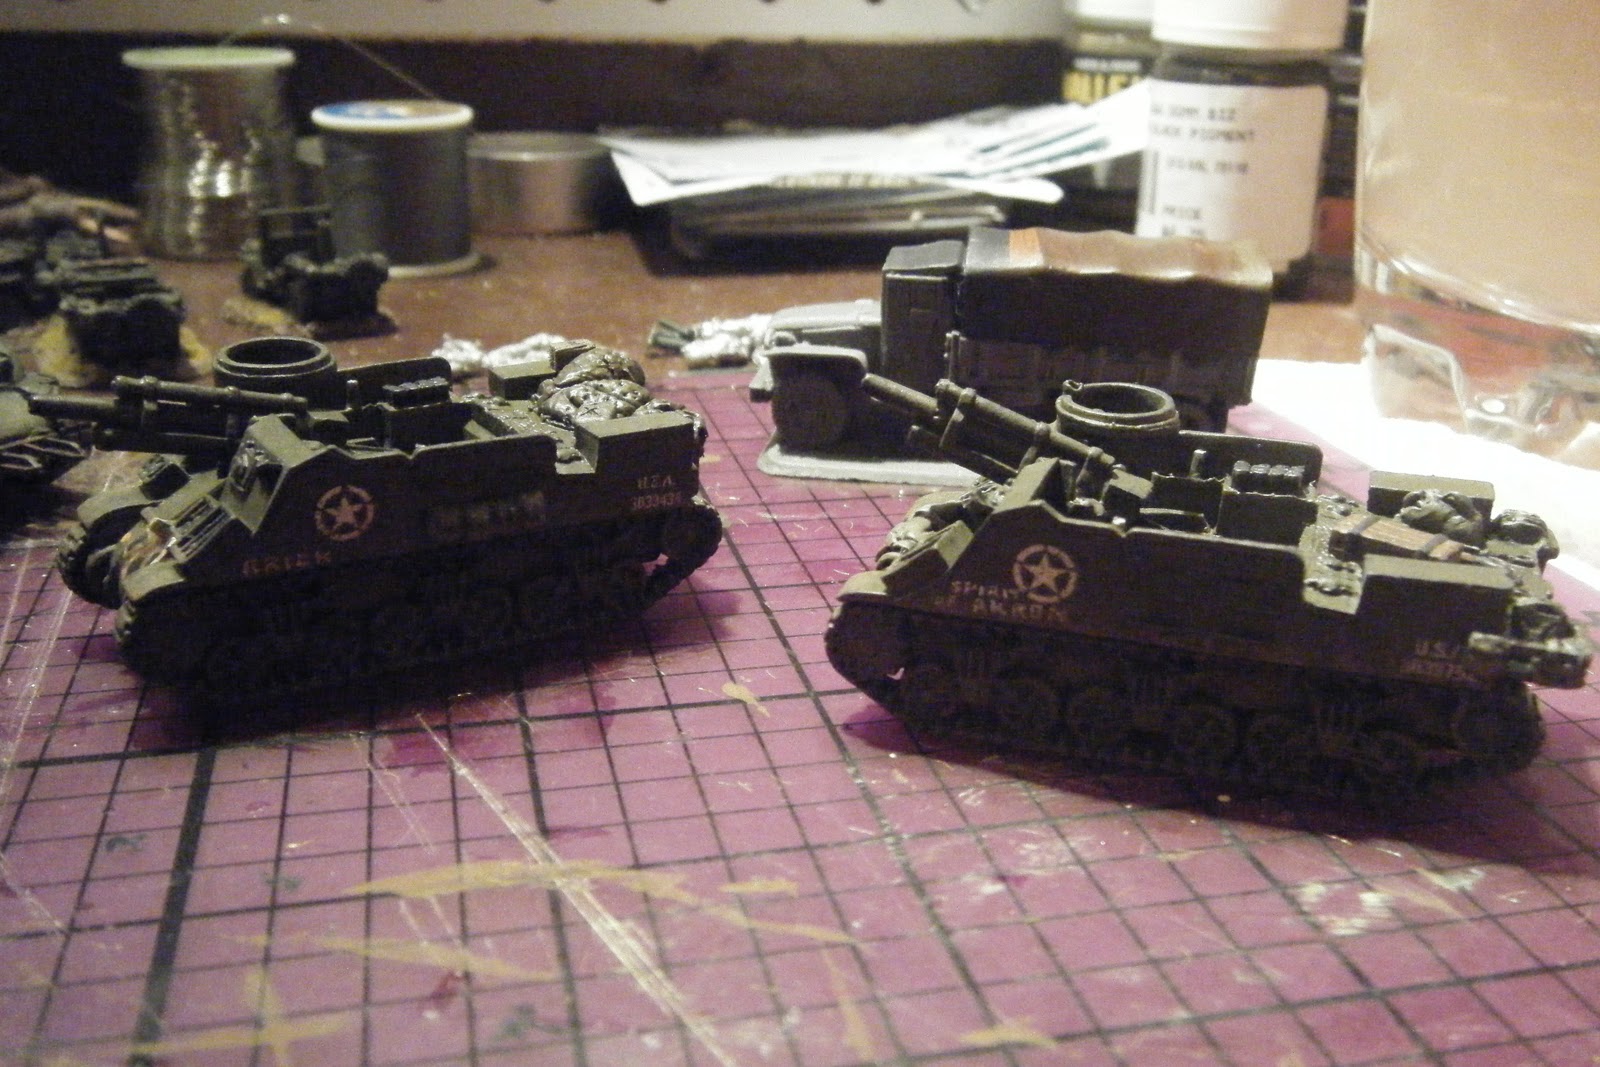
After adding all the extra stowage, tow cable, etc. I washed the model in warm water with a few drops of dishwashing soap in it to remove any residue from manufacturing. Once dry, I spray primed the tank with Battlefront's German Armour. I use this on most of my FoW stuff.


In the order of application, here are the paints used. Unless specified otherwise, all of the paint colors are Vallejo:

1. Brown Violet - Heavy drybrush over most of the tank

2. German Grey - Heavy drybrush on tracks and contact surfaces of roadwheels, also for MG's

3. Calthan Brown (Citadel) - wooden tool handles, crates, etc.

4. US Field Drab/Khaki/Tan Earth/Green Grey/Brown Violet - any combination or mixture of these colors to represent the varying shades of US field gear on bedrolls, packs, etc.

5. Gunmetal (Citadel) - exposed metal such as metal parts of tracks, tow cables, fairly fresh battle damage, MG's. I will often mix German Grey to tone down the "metallic" shimmer

6. Red Leather (Vallejo)/Scorched Brown (Citadel) - very light to moderate drybrushing to represent rust

7. Graveyard Earth (Citadel) - very light to light drybrush for weathering

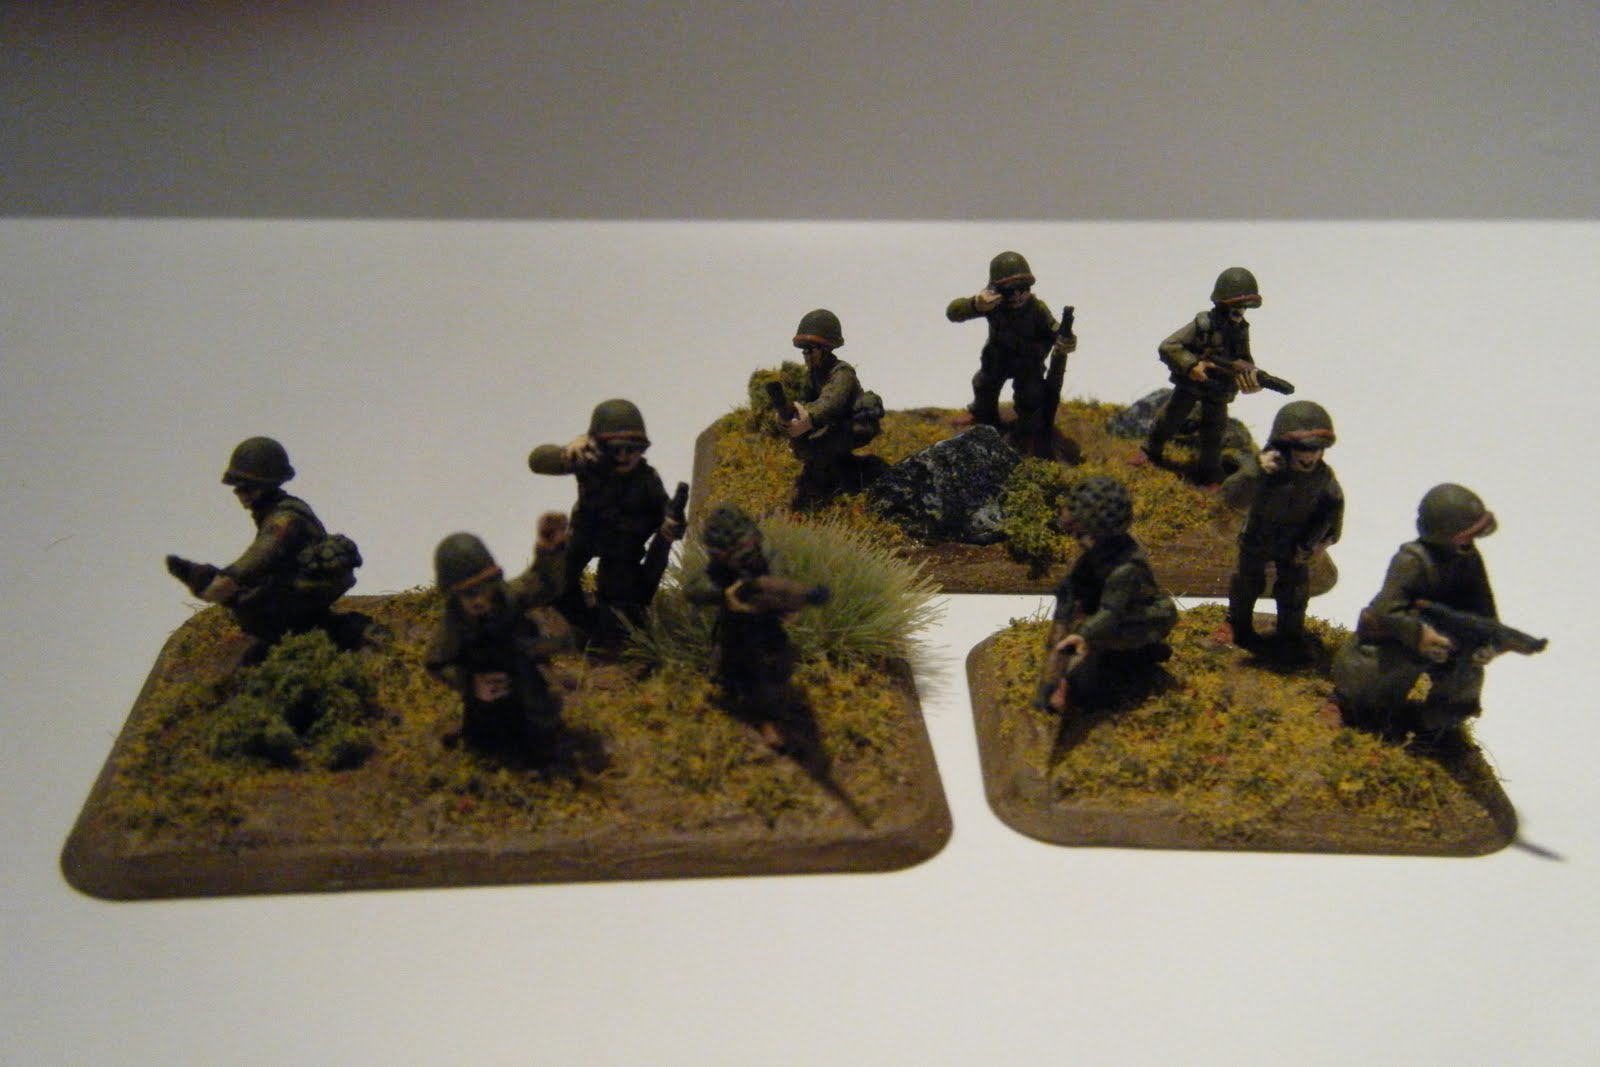
8. Ryn Flesh (Formula P3) - Flesh base coat

Those are the main paints and their applications that I use. Not included are the colors for crew uniforms or very small detail items (i.e. Taillights).


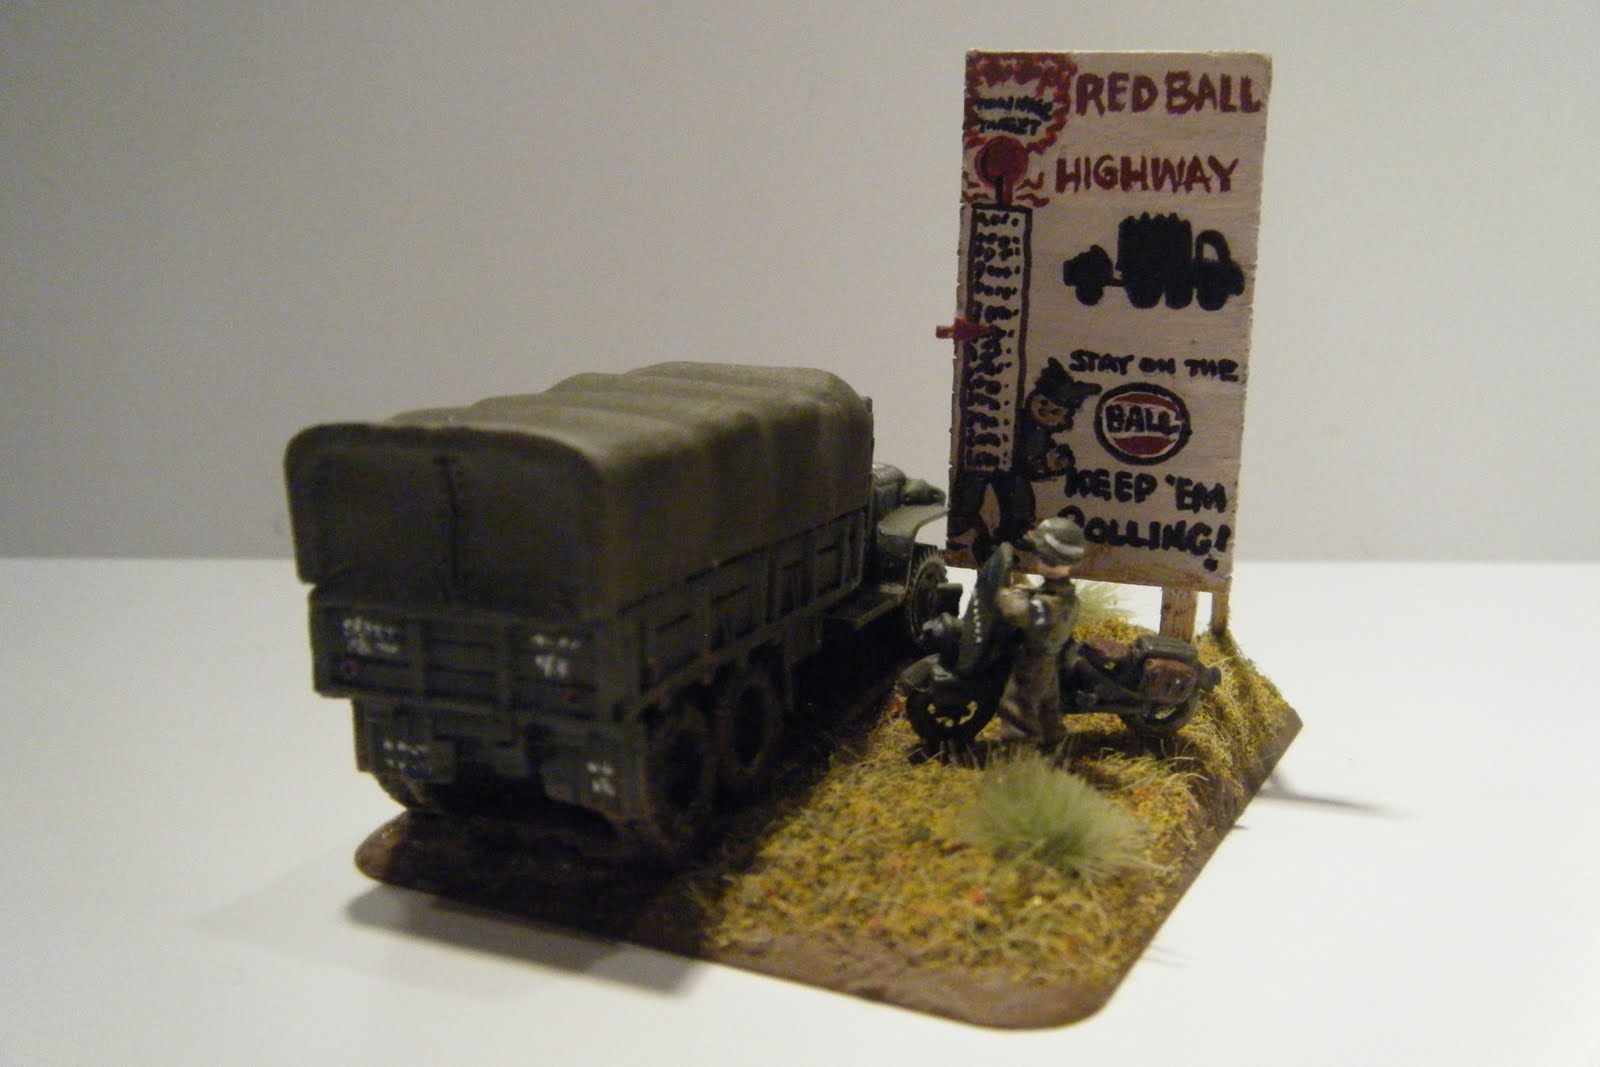
Once the basecoating is done (before weathering), I apply Gloss Varnish (Vallejo) to the areas where I am going to place decals. The order of the process, allowing drying time between each step, is:

1. Gloss Varnish

2. Apply Decal (removing excess water with the corner of a paper towel)

3. Decal Softner (Vallejo)

4. Gloss Varnish over the decal

5. Matt Varnish (Vallejo) over all areas that were coated with gloss varnish

This drawn-out process takes a little while, but is well worth it in order to hide the edges of decals. I also hand paint a name (if needed) on the tank with white (Citadel) at this stage. Once the top coat of matt varnish is dry, I take a small piece of foam torn from a Battlefront blister pack and VERY LIGHTLY dab on German Grey. I make sure to get some on the newly applied decals in order to further blend them in. This step helps achieve the "war-weary", paint chipped look I like on my models.

For the next step, I use a combination of watered-down Black Shade and Brown Shade (Vallejo) for my shading.I allow the shade to run into the crevices and bring out details. I very sparingly use highlights, if at all.

For more aging, I VERY LIGHTLY drybrush white or light streaks down the sides of the tank. I also will add fuel spills/drips around the fill points with thinned gloss varnish with a drop of black shade for good measure.

The final step is the dirt and dust weathering. This can be done very sparingly or heavy, depending on the area. I use Graveyard Earth. This is the same color I use for my infantry stands. The further up the vehice I go, the lighter the drybrushing.


I have yet to try it, but will be messing around with pigments to represent the carbon around the gun muzzles. I have also added antennas to many of my vehicles using 14-lb. test fishing line.

If you're still awake, I hope you've enjoyed this article, long-winded as it may be.

Cheers!
-Rhinexing

10.24.2011

OP Sherman Update -1

Prior to priming the OP Sherman and the third and last P-38 of my flight, I decided to add a tow cable to the tank. I used the same 26 gauge wire mentioned in my previous post for the cable, and created eye ends using green stuff. I also added an additional musette bag hanging from the tow cable. Once glued in place, I scored the wire with an X-acto to add detail.

The P-38 required a good bit of prep work. There was a good bit of flash on the model as well as several casting defects. I repaired the worst defect on the port wing with green stuff.

The next post in the series will include the first dry brushing. Cheers!


10.22.2011

A rare behind the scenes look... LOL!

I'm really terrible about taking "work-in-progress" shots, skipping to the final product. I thought I would remedy that by blogging along the way while completing my Artillery Observation Sherman Tank. For variety I went with an M4 (welded hull), as opposed to the M4A1's (cast hull) that make up my Medium Tank Platoon. This will help me distinguish the observation tank from the others easily.


For starters, I used a spare figure from another blister for the tank commander. I repositioned his arms and head. After the kit was assembled, I went to work with my normal detailing. I used a piece of 26 gauge wire for the hull MG. This is available on spools at most craft or sewing stores. I may fashion a tow cable out of it as well. The wooden timber on the front is a thinned down toothpick. The crates are made from a wooden coffee stir. I used green stuff to fix a defect in the gun mantlet casting, and to make the camo netting, bed rolls and musette bags. The holes in the camo netting are made with the gum massage part of an old toothbrush, and enhanced with the tip of an X-acto.

More to come...

Please let me know what you think!
-Rhine

10.05.2011

Air Support!

I'm still waiting on my third P-38 to complete my flight, but here are the two I have so far. The planes are not Battlefront models, but are metal 1-piece models from Command Decision Miniatures. I have painted the planes to represent post-Overlord. The invasion stripe top surfaces were often removed or painted over. Everything is hand-painted, including the plane's names. The P-38's did not include flight stands, so I made a few of my own design. I used large, heavy washers, styrene sheet, aluminum tube & scenery materials. Please post feedback... enjoy!


9.06.2011

Recon Forward!

So my list may not be as competitive as some of the other LW players out there, but I put this one together to use as many of my favorite vehicles as possible. The most conspicuous absentee from my list is the M5 Stuart light tank. It is my favorite vehicle of WWII, of any nation involved. Mostly because it was obsolete by 1942 (that's giving it the benefit of the doubt), and continued to trudge on through the end of the war. I'll eventually pickup a platoon or more, but for now my list will change little.

My other favorites that are a part of my list, at least occasionally, are:
- M18 Hellcat Tank Destroyer
- M8 Howitzer Motor Carriage
- M8 Greyhound Armored Car
- M20 Armored Utility Vehicle


I'm really terrible at taking "work-in-progress" pics to post to the blog. The pics of these M8 Greyhounds are about as close as I've gotten. They still need decals, weathering, .50 cal.'s, and matte finish. I'm very happy with how my M20's turned out. They still need a coat of matte as well though. All of these vehicles feature my normal green stuff "bedroll & baggage" treatment. I've also added some crates, rope & tarps to a few. I was very disappointed that Battlefront didn't cast these models with the dust skirts/fenders as an option, rather than casting them as one piece with the wheels. It was VERY common in NW Europe for American crews to remove the skirts in combat areas. They tended to collect a lot of mud, as well as being easily damaged. The large .50 cal.ring mounts for the M8's were also omitted by Battlefront.


In order to model the M8 & M20 without skirts I chose to use the wheel from the half-track models. Battlefront wanted $5 per half-track sprue (each sprue only includes 2 wheels). I couldn't see paying up to $15 to modify each vehicle... totally ridiculous! Instead, I made resin castings from my Armored Rifle Platoon's half-tracks. They aren't perfect, but I'm pleased with the results. Besides, it beats shelling out an additional $15 to make the vehicles look like they should have out of the package.

   On a final note, please check out my friend, GunBeryl's YouTube channel. He is a Flames of War modeling inspiration! Enjoy!

8.13.2011

Objective Markers & AOP

Here are a few shots of my completed objective markers and AOP. For the Red Ball Express marker, I modified the GMC 2-1/2 ton truck by carving out the driver's compartment and adding a driver figure. The military police motorcycle isn't a Battlefront model, (I can't recall the manufacturer). The "Ambulance with flat tire" marker features a highly modified Battlefront Dodge M6 37mm Gun Motor Carriage http://www.flamesofwar.com/Default.aspx?tabid=55&search=m6 .

Enjoy, and please share your thoughts/critiques.


7.05.2011

I can't wait to post pics!

My digital camera is on the fritz, and right now, it's not high on the priority list. It's a shame, because I've made a lot of progress on my LW US Armored Rifle army. My second Armored Rifle Platoon is based, with much of the painting completed. Their half-tracks are finished as well. I have finished two objective markers which I am very pleased with the results. My AOP Grasshopper is done. I am starting the process of adding mud/dirt weathering to my vehicles also. Not to mention, I've been helping my son finish painting his first 40K army.

As you can see, the old Rhinexing workbench has been pretty busy. I also participated in my first FoW tournament. I had a great time, but my finish was less than stellar.

I will post pics as soon as I'm able.

6.10.2011

6th AD battle-tested... at last

Even though I don't have my entire force (I need a second armored infantry platoon, among other troops), I was able to play my first game using my own forces. My gaming store of choice is http://huzzahhobbies.com/ in Ashburn, VA. It's a little bit of a hike, but everyone is super friendly and the store is well-stocked.

Tonight was my US 6th Armored Division vs. well... an American Armored Infantry opponent (Matt). The lists were virtually identical, and provisions had to be made for my lack of required units.

I fielded:
Co. HQ
Armored Infantry Platoon  x1
Medium Tank Platoon (M4A1 75mm x3)
Assault Gun Platoon (M8 HMC  x2)
Armored Mortar Platoon (Command Half-Track + MMC  x2)

Not a "by-the-book" list, but I played the cards I was dealt. Matt was very patient and a lot of fun to play against. My M8 HMC's were knocked out quickly by his infantry, but my mortars made them pay dearly throughout the game. Matt attempted to swing around with his M8's (X2) and Shermans (x3) and flank my disembarked infantry as they were crossing bocage. My Shermans came to the rescue, losing 1 tank. My 2 remaining Shermans and 4 Bazookas knocked out all 3 of his Shermans in one turn! To wrap up... I lost a couple of infantry stands, my Mortar CO, and my entire Company HQ. The Company HQ fell victim to Matt's M8 HMC daredevils that raided deep into my territory. To end the game, I won when Matt failed his motivation roll after losing several platoons.

A lot of fun, but I have a lot to learn!

6.08.2011

From the field hospital to the front...

I've been AWOL due to hand, wrist and elbow surgery for a little more than a month.

I'm finally updating my blog with shots of some FoW projects completed before my surgery, as well as a few things I've just recently started. As always, comments are appreciated. Enjoy!


I love Green Stuff Putty! Most of my vehicles get some sort of putty customization.


Need more putty!


Armored Mortar command half-track & 3rd mortar carrier


A few of the MANY Jeeps to fill various roles.


1st Platoon commander with custom putty lightweight overcoat
1st Platoon


1st Platoon's Half-Track's dismounted .50 cal. MG's

1st Platoon's Half-Track's dismounted .30 cal. MG's

My favorite stand that I've completed thus far.